 All
All
 Dobson
 Refractors
 Ed & Apochromates
 Newtonian reflector
 Schmidt Cassegrain
 Maksutov-Cassegrain
 Solar
Solar
 Researcher
 Focal reducer
 Intelligent
 All
All
 Equatorial
 Alt/Az
 Harmonic
 Tripods
 Accessories
 All
All
 Wide angle
 Zoom eyepieces
 Reticulated eyepieces
 Barlow
 Plössl
 Binoculars
 Atmospheric Corrector
 All
All
 Visual
 Photo
Photo
 Polarisants
 Solar Filters
 Accessories
 All
All
 Color Cameras
 Monochrome Cameras
 Planetary/Guiding
 Objectives
 All
All
 Binoculars
 Spotting Scope and Monocular
 Elbows
 Optical Divider
 Mirrors
 All
All
 Bags and protections
 Supports and counterweights,
 Camera adapters
 Focuser
 Collimation
 Heating band
 Cables
 Collars
 Computers
 Fans
Fans
 Others
 All
All
 Weather Station
 Thermometer
 All
All
 Observatory/Domes
 Accessories
 Askar
Askar
 Celestron
 Explore Scientific
 GSO
GSO
 Optolong
 Touptek
 Vixen
Vixen
How to photograph a comet: equipment and techniques for superb results
When the sky lights up with a celestial visitor
In July 2020, the NEOWISE comet offered an unforgettable spectacle. All around the world, amateurs and astronomers looked up—and their cameras—to immortalize its long glowing tail. Photographing a comet has become an exciting challenge for sky enthusiasts: between ephemeral beauty and technical prowess. But how can you capture this stellar traveler that moves slowly through space?
Understanding the nature of a comet
Before taking out the camera, you must understand what you want to immortalize. A comet is an icy body originating from the outskirts of the Solar System. When it approaches the Sun, the heat sublimates its ices and releases dust and gas, forming a coma and often a magnificent tail oriented away from our star. These characteristics explain its diffuse and changing appearance, and require specific settings to capture its photo successfully.
Preparing the photo session
1. Find the comet and choose the right moment
First of all, consult astronomical ephemerides or dedicated apps (like Stellarium or SkySafari) to know the position of the comet in the sky. Some are visible before dawn, others at dusk. The ideal is to have a Moonless sky, far from light pollution, and a comet sufficiently high above the horizon. Astronomical twilight – when the sky is still dark but the comet is perceptible – often offers the most beautiful tones.
2. Choose a suitable place
Prefer an open, dark area away from city lights. A natural setting (mountain, solitary tree, body of water) can add a poetic touch to the composition. Check the weather: even a light veil of clouds can spoil the shot.
The equipment needed
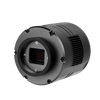
Camera and sensor
A DSLR or mirrorless camera with manual mode is essential. A full-frame sensor offers better performance in low light, but an APS-C sensor is perfectly adequate. Even some compact expert cameras or modern smartphones can produce decent shots with a good tripod and a manual control app.
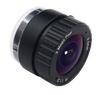
Lenses and accessories
- Wide-angle lens to capture the comet in the landscape.
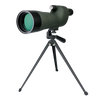
- Telephoto lens or astronomical telescope to isolate the nucleus and the tail.
- Stable tripod : essential to avoid any blur.
- Remote trigger or timer to avoid moving the camera.
- Red headlamp : useful for orienting yourself without harming your night adaptation.
Basic settings
- Manual mode to control exposure and focus.
- ISO sensitivity : between 800 and 3200 depending on the device.
- Aperture : as wide as possible (f/2.8, f/3.5…) to capture the faint light of the comet.
- Shutter speed : from 5 to 20 seconds without equatorial tracking. Beyond that, stars may elongate due to Earth's rotation.
- Focus : at manual infinity or with a bright star.
Do several experiments with different exposure combinations. RAW format is recommended to preserve the full dynamic range of the lights and enable effective post-processing.
To go further: astronomical tracking
For more detailed images, a motorized equatorial mount allows compensating for the Earth's rotation and lengthening the exposure time. It thus becomes possible to obtain a field of pinpoint stars and a better-defined comet, or even to capture the subtle nuances of its ion tail.
Composition and creativity
A comet is not just an astronomical subject: it is also an aesthetic element. Include the terrestrial environment – the silhouette of a tree, a ridge, a monument – to create a contrast between sky and earth. Also think about reflections, the play of colors at dawn or dusk. These details transform a simple scientific image into a poetic work.
Image processing
Post-processing is an essential step. Use software like Lightroom, Photoshop or free tools dedicated to astrophoto (Siril, DeepSkyStacker) to adjust white balance, reduce noise and strengthen contrasts. Some astrophotographers stack several shots to improve the rendering of the nucleus and the hair, while aligning the stars or the comet according to the artistic aim sought.
Safety and photographer ethics
In a nocturnal environment, keep in mind a few rules: respect nature, avoid protected areas and leave no trace of your passage. Astronomical photography goes hand in hand with patience and humility: the comet follows its own trajectory, often unpredictable. Sometimes it takes several nights to obtain the dreamed shot.
Awe and continuity
Each comet is unique. Some, like Hale-Bopp or NEOWISE, mark an entire generation. Others go unnoticed. Photographing a comet is to freeze the fleeting moment when a fragment of the origins of the Solar System reveals itself to our eyes. It is also one of the rare moments where science meets poetry, and where the patience of a solitary observer becomes a universal image of celestial beauty.
Conclusion: a photographic and cosmic journey
Photographing a comet is to combine preparation, technique, and wonder. It requires knowing a little astronomy, a lot of patience, and a good dose of curiosity. Whether you are using a simple device or advanced equipment, the important thing is to enjoy the spectacle. For every image of a comet tells of a meeting between the Earth and a visitor from the far reaches of the Solar System – a meeting your lens can render eternal.